How to Format an SD Card to FAT32? (Using FAT32 GUI Formatter)
If you have ever tried to set up a retro gaming console like the Nintendo 3DS, flash firmware on a 3D printer, or set up a Raspberry Pi, you’ve probably run into a frustrating roadblock: the device insists on using a FAT32 file system, but your modern SD card is either exFAT or NTFS.
Even worse, when you plug your 64GB, 128GB, or 256GB micro SD card into your Windows 10 or Windows 11 PC, right-click, and hit format, the FAT32 option is completely missing.
Trust me, I’ve been there, staring at my screen wondering why a modern OS can’t do something so basic. Fortunately, there is a dead-simple, free workaround. In this guide, I will show you how to format a large SD card to FAT32 using a lightweight, reliable tool called FAT32 GUI Formatter (also known as guiformat).
Why Windows Won’t Let You Format Large SD Cards to FAT32
Before we jump into the steps, let’s clear up a common misconception. Many people think their high-capacity SDXC card is broken when they don’t see the FAT32 option. It’s not.
Windows has an arbitrary, legacy limitation dating back to the Windows 95 era: native Windows tools (like File Explorer and Disk Management) will not format any drive larger than 32GB into FAT32. If your card is 64GB or larger, Windows forces you to choose between NTFS or exFAT.
While exFAT is great for transferring large video files between PCs and Macs, many older gadgets, car stereos, dashcams, and specialized hardware simply refuse to read it. They require FAT32. That is exactly where FAT32 GUI Formatter by Ridgecrop Consultants comes to the rescue. It bypasses the Windows limit seamlessly, allowing you to format drives up to 2TB in size.
You Need Before Starting
Before we press a single button, let’s make sure you have everything ready to go.
- Your Target SD Card: Whether it’s a 64GB SanDisk Ultra or a massive 256GB Samsung EVO, make sure it is plugged into your PC.
- An SD Card Reader: If your laptop doesn’t have a built-in slot, you will need a USB SD card adapter.
- The Software: Download the FAT32 GUI Formatter (guiformat.exe). It’s a portable application, meaning there is no messy installation process—you just download the file and run it.
🚨 CRITICAL WARNING: Formatting will permanently erase everything on your memory card. Photos, save files, configurations—gone. Take thirty seconds right now to copy any important data from your SD card into a temporary folder on your desktop. Don’t skip this step!
How to Use FAT32 GUI Formatter
Now, let’s get into the actual process. It takes less than two minutes from start to finish.
Step 1: Download and Run the Tool
First, head over to our download center to download guiformat.exe. (Be careful to download it from the official source to avoid unwanted malware).
Once downloaded, don’t just double-click it.
- Right-click on the
guiformat.exefile. - Select Run as administrator.
If you don’t run it as an admin, Windows might block the software from interacting with your hardware partitions.
Step 2: Identify Your SD Card’s Drive Letter
Open your standard Windows File Explorer (Win + E) and look under “This PC”. Find your SD card and take note of its specific Drive Letter (for example, D:, E:, F:,or G:).
Personal Tip: I always unplug any other external hard drives or USB thumb drives before doing this. The last thing you want to do is accidentally format your 2TB external backup drive because you misread a drive letter!
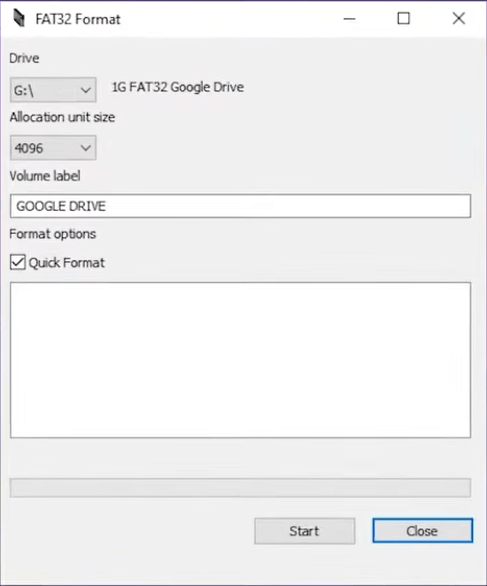
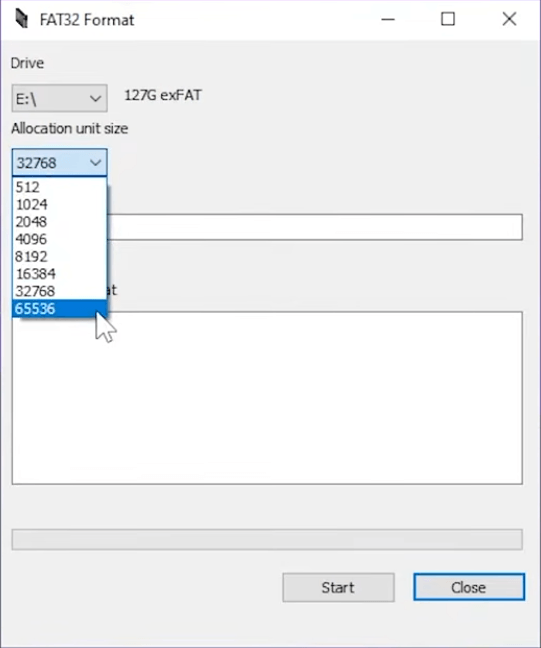
Step 3: Configure the Formatting Settings
Now, bring up the FAT32 GUI Formatter window. The interface is wonderfully retro and minimalist—no confusing menus, just a straightforward dialog box. Let’s configure it correctly:
Drive: Click the dropdown menu and select the exact drive letter you noted in the previous step. Double-check this!
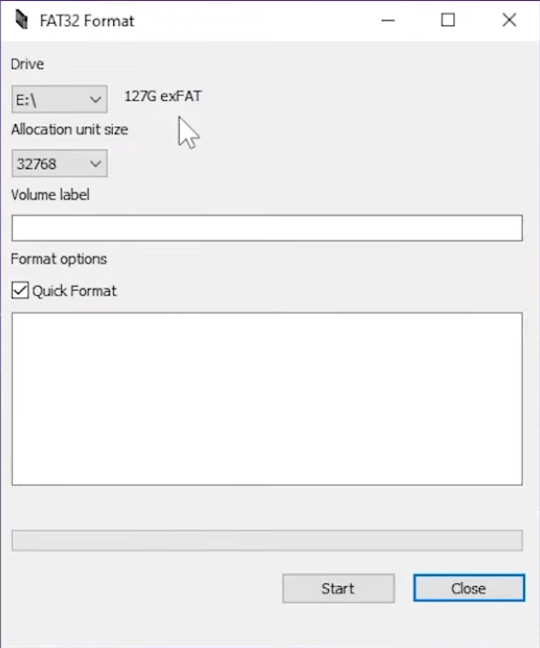
Allocation Unit Size: By default, this is usually set to 32768 (which is $32\text{ KB}$). For most devices, like the Nintendo 3DS, Raspberry Pi, or dashcams, leaving this at the default setting works perfectly.
Volume Label: This is just the name of your card. You can type something helpful here like SWITCH, 3DS, or DASHCAM, or simply leave it blank.
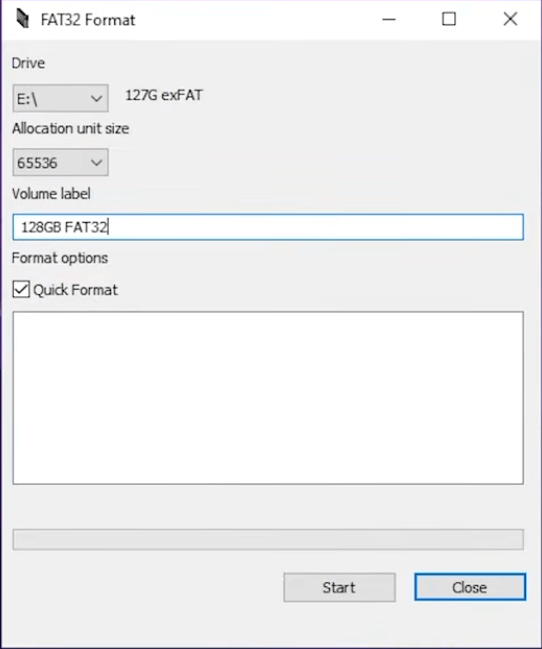
Quick Format: Ensure this checkbox is ticked. If you uncheck it, the tool will perform a full write-pass on the card, which can take hours on a 128GB or 256GB card and puts unnecessary wear and tear on the flash memory.
Step 4: Execute the Format
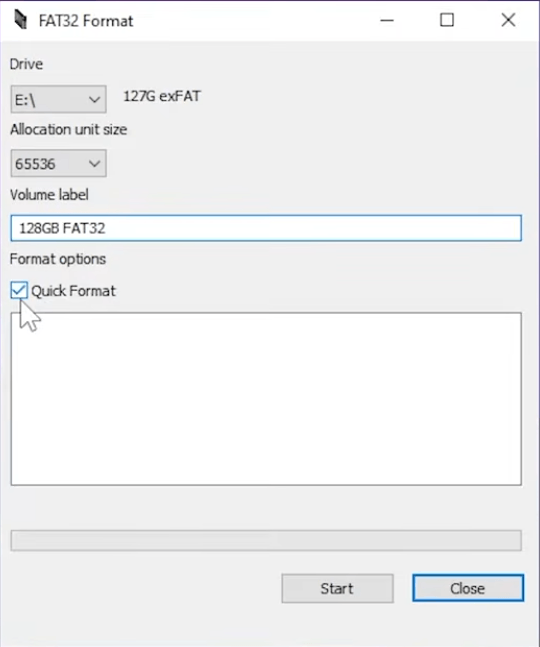
Once you’ve verified that you have selected the correct drive letter, you are ready to pull the trigger.
Click the Start button at the bottom of the window.
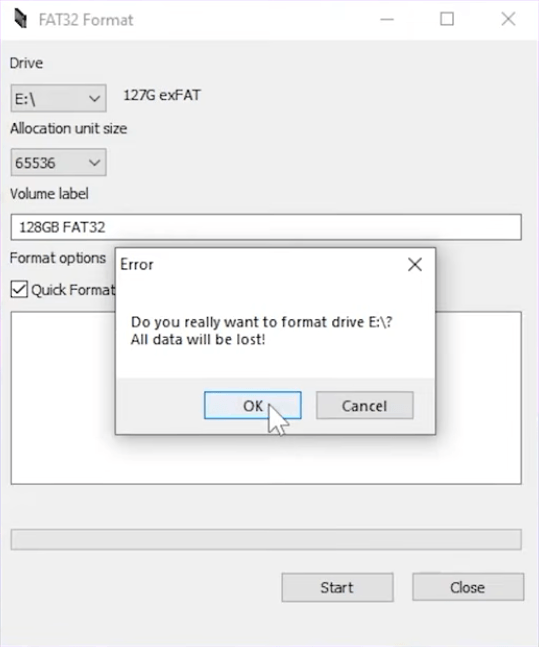
A warning popup will appear, screaming at you that all data will be lost. Take one final deep breath, ensure you backed up your files, and click OK.
The program will begin processing. For a standard Quick Format, it usually takes just a few seconds.
When it finishes, you will see the status update to “Done” at the bottom of the log window.
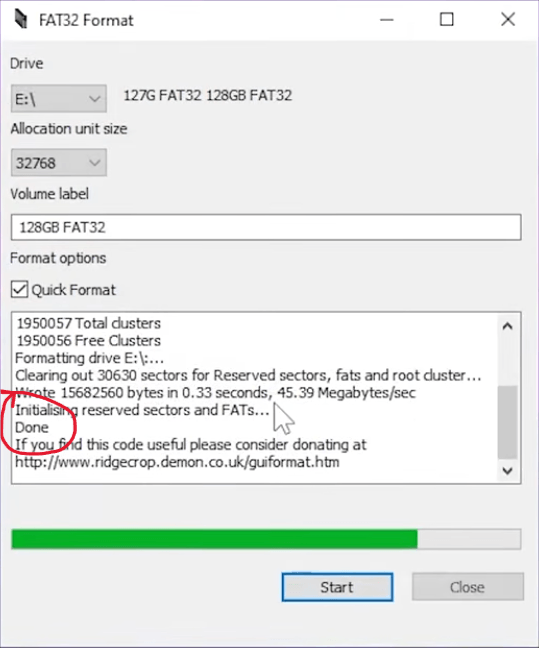
Congratulations! Your high-capacity SD card is now officially formatted to FAT32. You can safely eject it from your PC and slide it into your target device.
Common Errors & How to Fix Them
Even with a tool this simple, Windows sometimes likes to throw a wrench in the gears. If you run into an error, don’t panic. Here are the two most common hiccups I encounter and how to fix them:
“Failed to open device” or “Failed to lock volume”
This is the most common error by far. It happens because another program on your PC is actively “looking” at the SD card, preventing the GUI Formatter from taking exclusive control of it.
- The Fix: Close any open File Explorer windows. Make sure you don’t have Task Manager, a disk benchmarking tool, or an emulator open that might be scanning the drive. If all else fails, simply restart your computer, open guiformat first thing, and try again.
The Tool is Frozen or Not Responding
If you click start and the program immediately locks up, it usually means your card reader momentarily disconnected, or the SD card has a corrupted partition layout.
- The Fix: Use Windows’ native Disk Management tool to delete the volume on the SD card entirely, create a simple new exFAT volume, and then run the FAT32 GUI Formatter again.
FAQ
Can I format a 64GB or 128GB SD card to FAT32 without losing data?
Short answer: No. Formatting inherently wipes the storage drive clean because it rewrites the entire file system framework. If anyone tells you otherwise, don’t trust them! The only safe way to keep your data is to manually copy all your files to your PC’s internal hard drive before running the FAT32 GUI Formatter, and then paste them back onto the card once the formatting process is complete.
Is FAT32 GUI Formatter (guiformat) safe to use?
Yes, it is incredibly safe, lightweight, and has been a trusted staple in the tech and gaming community for well over a decade. It doesn’t install any background services, bloatware, or adware on your system. However, because it directly interacts with your computer’s disk drives, malicious third-party sites occasionally bundle it with bad software. To stay safe, only download it from the official Ridgecrop Consultants website.
Why is FAT32 limited to 32GB in Windows, but this tool can bypass it?
This is actually a limitation built into Windows, not a limitation of the FAT32 file system itself. Structurally, FAT32 can theoretically support drives up to 2TB or even 8TB. Back in the Windows 95 development days, an engineer named Dave Plummer set an arbitrary 32GB format limit during a temporary design session, and Microsoft just never removed it. FAT32 GUI Formatter simply unlocks what the file system was already capable of doing.
What is the maximum file size limit on a FAT32 SD card?
This is the biggest catch you need to look out for. While the tool lets you format a massive 128GB or 256GB card, FAT32 still has a strict maximum single-file size limit of 4GB. This means if you try to transfer a single 5GB 4K movie file or a massive modern PC game file onto the card, the transfer will fail with an “unspecified error.” For retro ROMs, photos, and dashcam clips, this is rarely an issue, but it’s something to keep in mind.
Conclusion
Bypassing Windows’ ancient 32GB restriction doesn’t require messing around with confusing command-line prompts or buying expensive software. The FAT32 GUI Formatter makes the entire process painless, ensuring your older hardware can happily read modern, massive storage cards.
Just remember the golden rule of storage management: always backup your files first, and always double-check your drive letters.
Now that your card is formatted, you’re all set to load up your roms, firmware, or media files.